
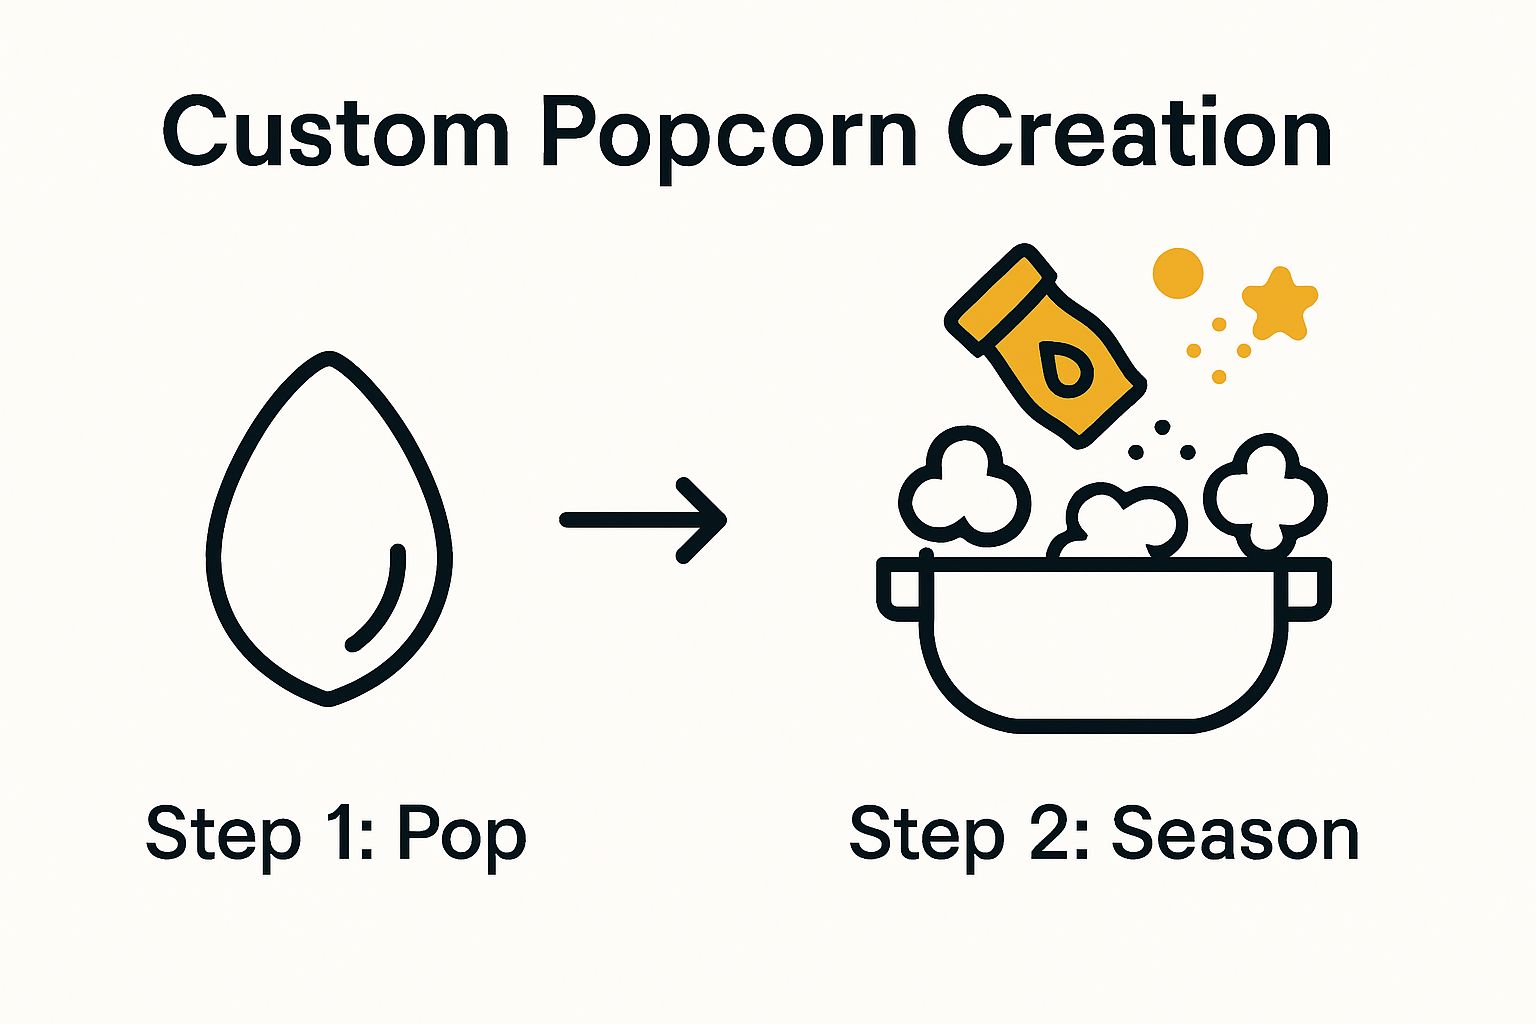
Master the Custom Popcorn Creation Process Step-by-Step
Making custom popcorn from scratch might sound simple. Yet, there is far more to it than tossing kernels in a pot and hoping for crunch. Wait until you discover that choosing the right oil alone can completely transform your popcorn, and just 2-3 tablespoons per 100 grams of kernels can change the flavour entirely. The real secret is, every little detail, from kernel choice to storage, makes all the difference between bland, chewy disappointment and a moreish snack people rave about.
Table of Contents
- Step 1: Gather Your Ingredients And Tools
- Step 2: Prepare The Base Popcorn
- Step 3: Create Unique Flavor Blends
- Step 4: Coat And Season The Popcorn
- Step 5: Package And Present Your Custom Popcorn
Quick Summary
| Key Point | Explanation |
|---|---|
| 1. Select quality popcorn kernels | Choose fresh, uniform kernels from reputable sources for the best popping results. |
| 2. Use the right popping methods | Employ a heavy-bottomed pot and control the heat to achieve light, crisp popcorn without burning. |
| 3. Apply seasonings carefully | Drizzle oil and layer seasonings gradually for even distribution and optimal flavour adherence. |
| 4. Package to maintain freshness | Use airtight containers and store in cool conditions to preserve your popcorn’s texture and flavour. |
| 5. Present attractively for sharing | Consider decorative packaging and clear labels to enhance the visual appeal when gifting or sharing your popcorn. |
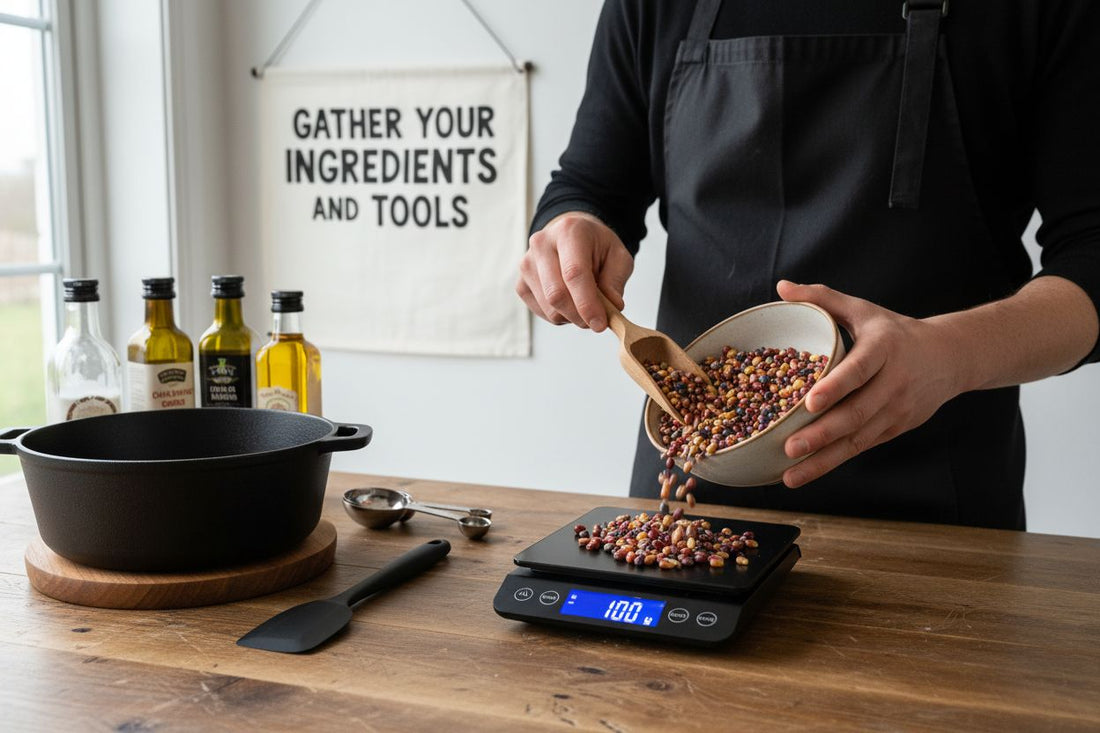
Step 1: Gather Your Ingredients and Tools
Starting your custom popcorn creation process requires careful preparation and thoughtful selection of ingredients and equipment. This initial step sets the foundation for crafting an exceptional popcorn experience that reflects your unique culinary vision.
Essential Popping Base Ingredients
At the heart of your custom popcorn creation lies the popcorn kernels themselves. Select high-quality, fresh kernels from reputable sources. Look for kernels that are uniform in size and free from moisture or damage. While standard yellow or white kernels work well, consider experimenting with heritage varieties like blue, red, or rainbow kernels for added visual intrigue.
Your oil selection plays a critical role in flavour development. Extra virgin olive oil provides a nuanced undertone, while coconut oil delivers a rich, slightly sweet essence. Avocado oil offers a neutral profile that allows other flavours to shine. Aim for approximately 2-3 tablespoons of oil per 100 grams of kernels.
The following table compares popular oil options for popcorn popping, summarising their flavour profiles and best use suggestions based on information provided in the article.
| Oil Type | Flavour Profile | Best Use Suggestion |
|---|---|---|
| Extra Virgin Olive | Nuanced, subtle undertone | Use for gourmet or herbal blends |
| Coconut Oil | Rich, slightly sweet | Ideal for sweet or tropical flavours |
| Avocado Oil | Neutral | Allows added seasonings to shine |
Equipment and Tools Needed
Choosing the right equipment transforms your popcorn creation from basic to extraordinary. A heavy-bottomed stainless steel or cast-iron pot with a lid works excellently for stovetop popping. If precision is your goal, consider a specialised popcorn maker that guarantees consistent heat distribution.
Key tools for your custom popcorn creation process include:
- Large mixing bowl for seasoning
- Measuring spoons
- Wooden spoon or silicone spatula
- Cooling rack
- Airtight storage containers
- Kitchen scale for precise measurements
Preparing your workspace is equally important. Clear ample counter space, have all ingredients within reach, and ensure proper ventilation. Temperature control is crucial both during popping and seasoning stages. A reliable instant-read thermometer can help monitor heat levels precisely.
Before beginning, take a moment to review your planned flavour profile. This preparation ensures you have all necessary spices, herbs, and additional ingredients ready. Whether you are crafting a savoury blend with smoked paprika and nutritional yeast or developing a sweet concoction with cinnamon and maple sugar, having ingredients pre-measured prevents interruptions during the creation process.
By meticulously gathering your ingredients and tools, you establish a solid foundation for an exceptional custom popcorn experience. Each carefully selected component contributes to the final flavour, texture, and presentation of your unique creation.
Below is a summary table of the essential ingredients and equipment needed for the custom popcorn creation process, highlighting each item’s purpose for ease of preparation.
| Item | Type | Purpose |
|---|---|---|
| Popcorn Kernels | Ingredient | Basis of the snack; choose high-quality for best texture |
| Oil (Olive, Coconut, etc.) | Ingredient | Aids popping, imparts flavour, helps seasonings adhere |
| Heavy-bottomed Pot with Lid | Equipment | Ensures even heating and successful, unburnt popping |
| Large Mixing Bowl | Equipment | For tossing popcorn with oil and seasonings |
| Measuring Spoons | Equipment | For accurate measurement of oil and spices |
| Wooden Spoon/Silicone Spatula | Equipment | For gentle mixing and folding without damaging popcorn |
| Cooling Rack | Equipment | Allows popcorn to cool and prevents sogginess |
| Airtight Storage Container | Equipment | Maintains freshness and crispness post-creation |
| Kitchen Scale | Equipment | For precise weighing of ingredients |
Step 2: Prepare the Base Popcorn
With your ingredients and tools assembled, the custom popcorn creation process moves into its critical transformation stage: preparing the base popcorn. This fundamental step determines the texture, quality, and potential of your final snack. Mastering the popping technique requires precision, patience, and an understanding of kernel dynamics.
Stovetop Popping Technique
Begin by selecting a heavy-bottomed pot with a tight-fitting lid that allows steam to escape while preventing kernels from flying out. Heat your chosen oil over medium-high temperature, using approximately 2-3 tablespoons per 100 grams of kernels. The oil should shimmer but not smoke, indicating the optimal popping temperature around 180-200 degrees Celsius.
Add 3-4 test kernels to the oil and cover the pot. When these kernels pop, it signals the entire pot is ready. Quickly add the remaining kernels in a single layer, ensuring they touch the pot’s bottom. Cover immediately and gently shake the pot back and forth across the burner. This movement prevents burning and promotes even heating.
As popping intensifies, listen carefully. When popping slows to approximately 2-3 seconds between pops, remove the pot from heat. Important: Do not wait for complete silence, as this risks burning the bottom layer of kernels. Transfer the popped corn immediately to a large mixing bowl, using a wooden spoon to prevent scratching.
For those seeking alternative methods, read more about innovative popping techniques, which might offer additional insights into kernel preparation.
Achieving Perfect Texture
The ideal base popcorn should be light, crisp, and free from burnt or unpopped kernels.
Gently spread the popped corn in a single layer on a large baking sheet or cooling rack. This allows steam to escape, preventing sogginess and maintaining a satisfying crunch. Remove any unpopped or partially popped kernels to ensure a uniform texture.
Temperature control remains crucial during this stage. Allow the popcorn to cool for 2-3 minutes, which stabilises its structure and prepares it for seasoning. Resist the temptation to immediately add flavourings, as residual heat can cause seasonings to become soggy or clump.
Verify your base popcorn’s quality by checking for these characteristics:
- Uniform golden or white colour
- Crisp, light texture
- Minimal burnt or unpopped kernels
- No visible oil pooling
By meticulously preparing your base popcorn, you create a perfect canvas for the upcoming flavour transformation, setting the stage for a truly remarkable custom popcorn experience.
This table provides a checklist to verify the quality of your base popcorn after popping and cooling, ensuring a perfect canvas for further seasoning and blending.
| Checklist Item | Completion Criteria |
|---|---|
| Colour Consistency | Even golden or white across all kernels |
| Texture | Crisp, light, and free from chewiness |
| Burnt or Unpopped Kernels | Minimal to none present |
| Oil Distribution | No visible oil pooling on popcorn |
| Cooling | Allowed to cool for 2-3 minutes post-popping |
| Structural Integrity | Kernels retain shape, not crushed or broken |
Step 3: Create Unique Flavor Blends
The art of crafting unique popcorn flavour blends transforms a simple snack into a culinary adventure. This critical stage allows you to express creativity, balance taste profiles, and develop signature combinations that tantalize the palate. Understanding flavour interactions and seasoning techniques becomes paramount in creating extraordinary popcorn experiences.
Foundational Flavour Principles
Begin by selecting high-quality, finely ground seasonings that will adhere effectively to your popped kernels. Dry spices work best when applied immediately after popping while a light layer of oil helps seasonings stick. Consider building complexity by combining complementary flavour families: earthy, umami, herbal, spicy, and sweet elements that create nuanced taste experiences.
Professional chefs recommend starting with a base seasoning and gradually introducing complementary notes. For instance, a fundamental Asian-inspired blend might combine nutritional yeast for umami, ground ginger for warmth, and a hint of toasted sesame powder for depth. Precision matters: use measuring spoons to maintain consistent ratios and prevent overpowering individual ingredients.
Explore our collection of unique popcorn mix options for inspiration in developing your signature blend. Experimenting with unexpected combinations can lead to remarkable discoveries.
Seasoning Application Techniques
Seasoning application requires a delicate touch. Transfer your freshly popped corn to a large mixing bowl, allowing ample space for even coating. Drizzle a thin layer of oil recommended in step two across the kernels, using a silicone spatula to gently fold and distribute. This creates a light, even surface for seasonings to adhere.
Add your prepared spice blend gradually, employing a technique called “layering”. Sprinkle seasonings in small increments, folding the popcorn between each addition. This ensures uniform distribution and prevents clumping. For those seeking intense flavour concentration, consider these strategic seasoning approaches:
- Start with mild, foundational spices
- Progressively introduce more potent flavour elements
- Taste and adjust seasonings incrementally
- Use fine mesh sieves for even spice distribution
As research from BBC Good Food suggests, the key to exceptional flavour lies in balance and experimentation. Some combinations might surprise you with their harmonious complexity.
Verify your flavour blend’s success by checking for these indicators: consistent seasoning coverage, balanced taste without overwhelming individual notes, and an appealing aroma that invites further exploration. Remember, creating the perfect custom popcorn blend is part science, part art – embrace the journey of culinary discovery.
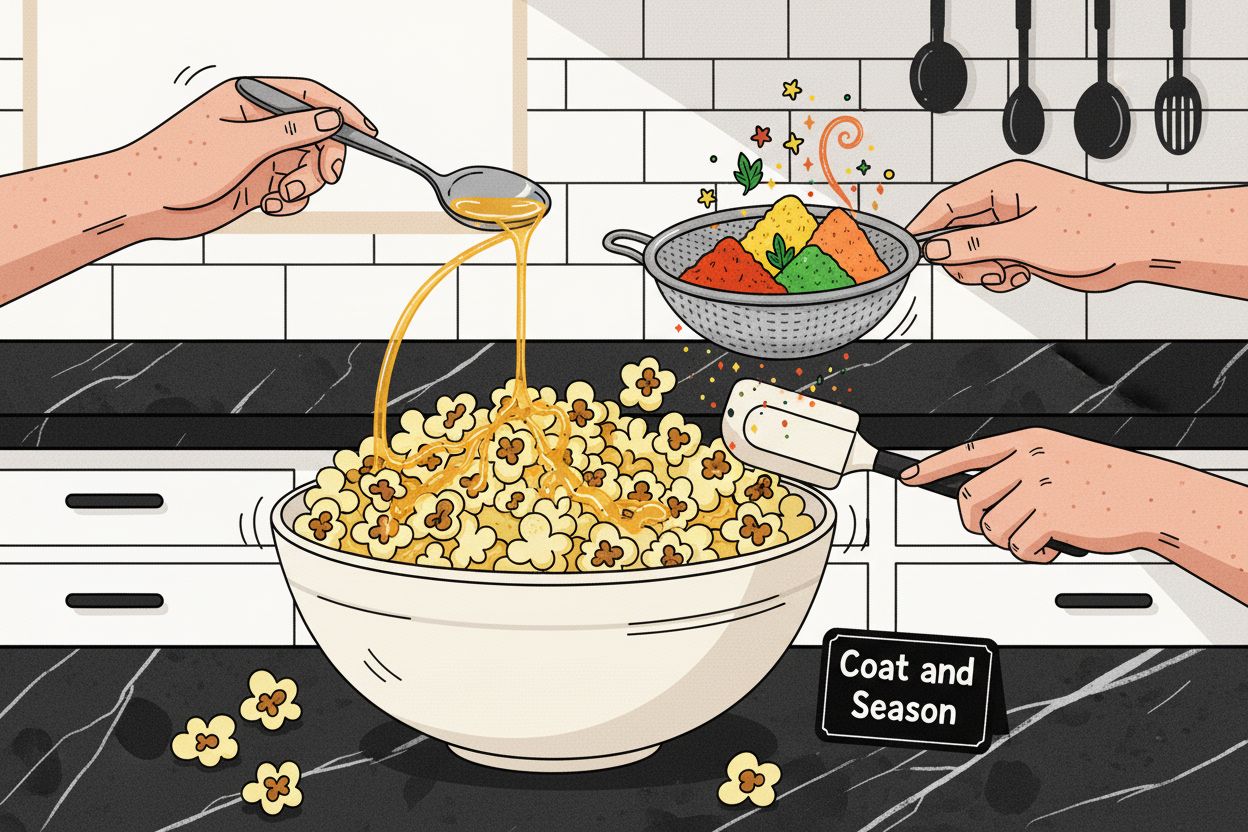
Step 4: Coat and Season the Popcorn
The coating and seasoning stage represents the transformative moment in your custom popcorn creation process, where carefully selected ingredients elevate simple popped kernels into a gourmet experience. This critical step demands precision, creativity, and an understanding of how different liquids and dry seasonings interact with your popcorn base.
Liquid Coating Techniques
Begin by selecting a liquid base that complements your chosen flavour profile. Melted coconut oil provides a neutral, rich foundation that helps seasonings adhere beautifully. For those seeking classic flavour combinations, consider using extra virgin olive oil or a small amount of melted plant-based butter alternative.
Apply your liquid coating strategically. Transfer popped kernels to a large mixing bowl with ample space for movement. Drizzle the oil sparingly, using a silicone spatula to fold and turn the popcorn. Important: Work quickly to prevent soggy kernels. The goal is a light, even coating that provides just enough moisture for seasonings to stick.
For optimal adhesion, maintain a temperature between 50-60 degrees Celsius. This warmth helps the oil distribute evenly without causing the popcorn to become greasy. Use a fine mesh strainer or sifter to sprinkle dry seasonings, ensuring uniform coverage across every kernel.
Seasoning Application Mastery
Dry seasoning application requires a nuanced approach. Begin with fine powdered ingredients like nutritional yeast, ground spices, or finely grated plant-based cheese alternatives. Salt should be added last, as it tends to draw moisture and can compromise crispness if introduced too early in the process.
Consider these strategic seasoning principles:
- Layer seasonings gradually
- Use minimal liquid for coating
- Rotate bowl during seasoning
- Taste and adjust incrementally
- Allow brief resting period for flavour melding
Experimentation becomes key in developing unique flavour profiles. A pinch of smoked paprika, ground wasabi, or crushed dried herbs can transform an ordinary batch into an extraordinary culinary creation. Some adventurous creators even incorporate finely ground nuts or seeds for additional texture and depth.
Verify your coating success by checking for these indicators: uniform colour distribution, consistent seasoning coverage, and a crisp texture that maintains the popcorn’s structural integrity. Each kernel should glisten lightly with oil and be evenly coated with your chosen seasonings. The final product should smell inviting and exhibit a balanced, complex flavour profile that tantalises the palate.
Step 5: Package and Present Your Custom Popcorn
Packaging and presenting your custom popcorn represents the final flourish in your culinary creation, transforming a delicious snack into an artisanal experience. This crucial stage goes beyond mere containment, offering an opportunity to showcase your creativity, preserve flavour integrity, and potentially create a memorable gift or shareable treat.
Selecting Appropriate Packaging
Choose containers that complement your popcorn’s unique flavour profile and intended purpose. Airtight containers are essential for maintaining crispness and preventing moisture absorption. Glass jars with tight sealing lids work excellently for short-term storage, while vacuum-sealed bags provide extended freshness for longer preservation periods. Learn more about packaging options to determine the most suitable approach for your specific creation.
Important considerations for packaging include maintaining optimal texture, preventing flavour degradation, and protecting against environmental factors. Transparent containers allow visual appreciation of your popcorn’s colours and seasonings, while opaque options can protect against light exposure that might compromise ingredient quality.
Temperature and humidity play significant roles in popcorn preservation. Store your packaged popcorn in cool, dry environments away from direct sunlight. Ideal storage temperatures range between 15-20 degrees Celsius, with humidity levels below 50% to prevent staleness or potential mould development.
Presentation and Aesthetic Considerations
Presentation transforms your popcorn from a simple snack to a gourmet experience. Consider using kraft paper bags, decorative tins, or custom-printed containers that reflect the flavour’s character. For gifting purposes, layer different flavoured popcorns in clear glass jars, creating visually appealing stratified designs that showcase your culinary creativity.
When preparing popcorn for sharing or gifting, pay attention to these essential presentation elements:
- Use clean, food-safe containers
- Label with flavour name and creation date
- Include brief serving suggestions
- Consider adding decorative ribbons or custom tags
- Ensure packaging prevents moisture infiltration
For optimal freshness, consume your custom popcorn within 1-2 weeks of preparation. Create small batches to ensure maximum flavour integrity and crisp texture. Professional chefs recommend preparing smaller quantities more frequently rather than large batches that might lose their peak qualities.
Verify packaging success by checking for these indicators: intact kernel structure, maintained seasoning adherence, absence of moisture condensation, and an enticing aroma that hints at the flavourful experience awaiting consumption. Your custom popcorn is now ready to be savoured, shared, or gifted with pride.
Elevate Your Popcorn Mastery with PopCornaa’s Custom Creations
You have learnt the essential steps to creating exceptional custom popcorn at home, but sourcing rare ingredients, achieving flavour harmony, and packaging your masterpieces can be overwhelming and time-consuming. Achieving crisp texture, balanced seasoning, and bold, unique profiles such as wasabi, matcha, and sriracha often means hunting down hard-to-find components and experimenting through trial and error.
Instead of facing these challenges alone, experience the craft, innovation, and unmistakable quality of Custom Popcorn Box | Build Your Own Vegan Snack Pack. Let our range of vegan gourmet popcorn, featuring award-winning Asian-inspired blends, take the guesswork out of your next snack adventure.
Ready to taste your perfect custom mix without the mess or hassle? Visit PopCornaa.com today and build your dream box. Discover large 5ltr Popcorn Buckets for sharing, explore creative flavour combinations, and take advantage of fresh releases and exclusive deals in just a few clicks. Transform passion into delicious results now.
Frequently Asked Questions
What essential ingredients do I need for the custom popcorn creation process?
Selecting high-quality popcorn kernels is crucial, alongside a suitable oil for flavour. Aim for around 2-3 tablespoons of oil per 100 grams of kernels and consider experimenting with different kernel varieties to customise your popcorn experience.
How do I prepare the base popcorn for my custom flavours?
To prepare the base popcorn, heat the oil in a heavy-bottomed pot and add your kernels in a single layer. Shake the pot gently as they pop and remove it from the heat when popping slows to every 2-3 seconds, ensuring a light, crisp texture.
What techniques can I use to create unique popcorn flavour blends?
Start with high-quality, finely ground seasonings that adhere well to your popcorn. Layer your chosen spices gradually after applying a light oil coating, and taste as you go to achieve a balanced and pleasing flavour combination.
How do I effectively coat and season my popcorn?
To coat your popcorn, drizzle a small amount of liquid oil over the popped kernels and fold gently to ensure even coverage. Follow up with a fine sprinkle of dry seasonings, layering them slowly to prevent clumping and maintain a crisp texture.
What packaging options are best for storing my custom popcorn?
Use airtight containers such as glass jars or vacuum-sealed bags to keep your popcorn crisp and fresh. Ensure the containers shield your popcorn from moisture and light, and store them in a cool, dry place to maintain optimal quality for about 1-2 weeks.
How can I present my custom popcorn as a gift?
Transform your popcorn into a delightful gift by using decorative containers that reflect the flavour. Label the flavour and creation date, and consider adding ribbons or custom tags for an attractive presentation while ensuring it remains sealed and fresh.